
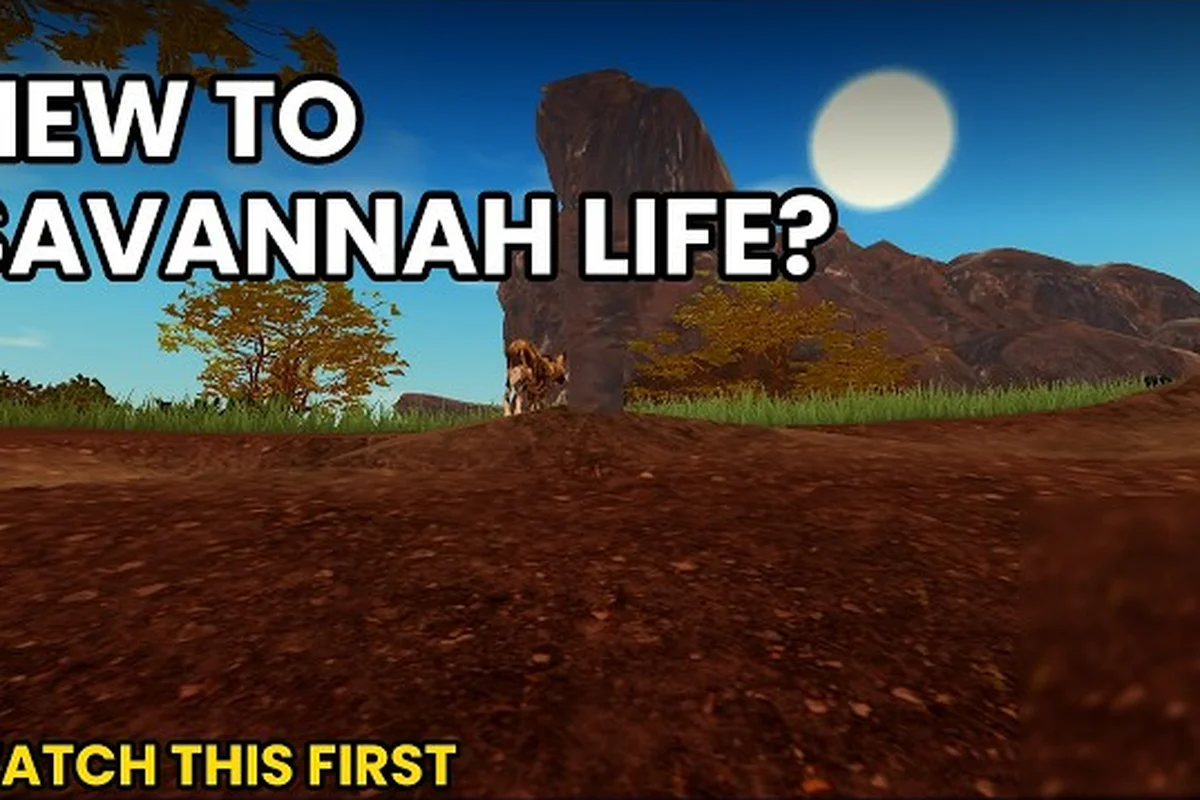
This savannah life guide gathers every system a new player needs under one roof, from controls and growth to survival and badge progression. The savanna is unforgiving on day one, and the gap between a player who knows the loop and one who doesn't usually decides whether a cub reaches adulthood or gets cleaned out by a passing crocodile inside the first ten minutes. Below, you'll find the same wiki-level reference — written from a player's perspective — covering the core loop, controls, growth stages, the badge roadmap, coins, and the savannah life tips that the community has refined across hundreds of hours. Bookmark this page; it doubles as a walkthrough for the systems no in-game tutorial ever explains properly.
Savannah Life Wiki Overview: Game Info, Roster, and the Core Growth Loop
Savannah Life is a Roblox wildlife survival simulator developed by NOYO Productions where players take the role of African fauna and try to grow from cub to adult while managing hunger, thirst, and stamina. According to the official Roblox page for Savannah Life, the loop centers on three survival bars that drain continuously, a growth system that gates your animal's stats behind age stages, and a server event calendar that includes Blood Moons and thunderstorms.
The roster is the first thing the savannah life wiki community documents, and it matters because every species has a different stat budget. There are 21 playable animals on the current patch, split across three weight classes: heavyweights (lion, elephant, rhino, hippo), mid-roster predators (leopard, cheetah, wild dog, cape buffalo), and small/utility picks (impala, hyena, giraffe, hornbill, crocodile). The NOYO Productions game page lists each species with a short description and a recommended playstyle.
What the Core Loop Actually Looks Like
Every session follows the same three-phase rhythm — a deliberate design choice that funnels new players into a tight survival funnel before the meta-game opens up. In the opening 5–8 minutes of a fresh spawn, nearly every action feeds the Survive meter, meaning a poorly managed cub wastes its first growth window just catching up on hydration. Once the Grow phase clicks (usually by day 2 in a standard server), XP routing shifts and territorial control in Thrive becomes the real differentiator between a mid-tier pride and a leaderboard badge.
-
Survive: eat, drink, and manage stamina so your hunger and thirst bars don't bottom out
-
Grow: earn XP through combat, exploration, and passive survival bonuses to age up from cub → juvenile → sub-adult → adult
-
Thrive: form a pride or herd, claim territory near a watering hole, and push badges or leaderboard ranks
The loop is shallow on paper but punishing in practice, because every system feeds the others. Hunger kills you faster than any predator if you ignore it, growth stages lock you out of stronger abilities, and badges reward both the grind and the smarts.
Animal Roster at a Glance
| Weight Class | Example Animals | Strengths | Weaknesses |
|---|---|---|---|
| Heavyweight (S/A-tier) | Lion, Elephant, Rhino, Hippo | High HP, top-tier damage, territory control | Slow stamina regen, expensive coin/Robux unlock |
| Mid-Roster (B-tier) | Leopard, Cheetah, Wild Dog, Cape Buffalo | Balanced stats, good stamina, mid cost | Lose duels to apex predators solo |
| Light/Utility (C-tier) | Impala, Hyena, Giraffe, Hornbill, Crocodile | Cheap or free, fast stamina, ambush or scout roles | Low HP, often prey-tier in open combat |
The roster is the foundation of every savannah life walkthrough because your species choice decides which strategies are even available. A cheetah has the burst damage to solo a juvenile gazelle but lacks the HP to contest a watering hole, while a hippo can hold a river bend against three lions but burns through stamina if it has to chase anything.
Controls, Key Bindings, and the First Five Minutes
The control scheme is the single most-skipped section in any savannah life guide for beginners, and it's also the one that costs the most lives in the first session. The game uses Roblox-standard WASD for movement, mouse for camera, and a short list of action keys for the survival verbs. Players who learn the bindings before they spawn have a measurable survival advantage over players who fumble through menus while their thirst bar empties.
Core Action Bindings
| Key | Action | When to Use It |
|---|---|---|
| WASD | Move | Always |
| Shift | Sprint (drains stamina) | Chasing prey or fleeing predators |
| Left Click | Bite/Attack | Combat |
| R | Eat (consume held food) | Hunger drops below 60% |
| Q | Drink at a water source | Thirst drops below 60% |
| F | Interact (den, nest, other players) | Family systems, forming prides |
| C | Crouch / Stealth (predator animals) | Ambush, stalk tall grass |
| Tab | Open player menu, badges, inventory | Mid-session check-ins |
The R key is the one that catches new players flat-footed. Eating requires you to first pick up food (left-click a carcass or plant), then press R to consume it; holding R does nothing without a held item, which is the most common cause of "I can't eat" reports on the savannah life wiki Discord. The Q key behaves the same way: you must stand at a watering hole, river bank, or puddle, then press Q to drink — running past water without stopping does not register.
The First 90 Seconds After Spawn
-
Pick a free starter animal (impala or hyena) on your first run — the premium picks cost Robux and lock you out of beginner-friendly safety margins
-
Spawn near a watering hole or burrow to shorten the distance to your first drink
-
Press R the moment you see hunger drop below 70%, and Q the moment thirst drops below 70% — don't wait for the warning chime
-
Sprint (Shift) only when chasing confirmed prey or escaping a confirmed predator — sprinting on cooldown empties stamina and leaves you sitting duck
-
Open Tab and look at the badge tracker — knowing which badges are active saves you from re-running the same map later
These five steps are the difference between a clean first hour and a frustrating restart loop. Most savannah life tips published on YouTube and Reddit skip the bindings section because they assume the player already learned them, but the binding knowledge is exactly what makes every other tip in this savannah life walkthrough work.
Survival Systems: Hunger, Thirst, Stamina, and the Day/Night Cycle
The survival layer is the heart of the game, and it is also where most of the savannah life wiki content gets dense. Three bars drain continuously, two of them (hunger and thirst) will kill you if they hit zero, and the third (stamina) gates every meaningful action you take. Layered on top of the bars is a day/night cycle that changes which predators are active and which prey is sleeping, and that cycle is what triggers the server-wide event calendar.
The Three Survival Bars Explained
| Bar | Drain Rate | Kill Threshold | Recovery Method |
|---|---|---|---|
| Hunger | Slow steady, faster while sprinting | 0% | Press R with held food |
| Thirst | Fastest of the three in hot biomes | 0% | Stand at water, press Q |
| Stamina | Drains on sprint, attack, and dodge | 0% = unable to move | Passive regen when idle, partial regen when walking |
The bars drain together, which is the mechanic most new players miss. You cannot fix one and ignore the others — sprinting to a carcass burns stamina and accelerates thirst, so a smart player eats and drinks before sprinting to a hunt, not after. The savannah life walkthrough pages on Deltia's Gaming flag this as the "eat and drink first" rule, and it shows up in nearly every community survival guide.
Day/Night Cycle and Server Events
The savanna runs a roughly 20-minute day/night cycle, with nights being significantly more dangerous because apex predators (lion, leopard, crocodile) get a stealth bonus after dark that stacks with their base night-damage bonus. This stealth window lines up with the server's clock tick, so watching the sky color shift from amber to deep indigo is the single most reliable signal that you have roughly 90 seconds to reach cover, a water trench, or a herd before predator AI starts prioritizing solo players. Every server ticks through a calendar of events:
-
Blood Moon — every 2–3 server hours, predator damage +50%, prey gets a one-time warning chime
-
Thunderstorm — random, reduces visibility and stamina regen, fires sometimes start on the western plains
-
Migration — server-wide buff that doubles XP for 5 minutes when a herd crosses the central river
-
Drought — rare, watering holes shrink and thirst drain doubles until the event ends
Players who learn to read the cycle and plan around Blood Moons report longer average lifespans and faster badge progress. The savannah life tips section in our first-day walkthrough covers the exact spawn-point choices that minimize Blood Moon casualties.
Cub-Stage Survival: The First 30 Minutes
Cub-stage is the most dangerous window in the entire game because your HP is roughly 30% of an adult's and your bite damage is low enough that most prey can outrun you. The community-tested cub strategy is:
-
Stay within 50 meters of a den or burrow for the first 15 minutes
-
Drink every 90 seconds, eat every 2 minutes
-
Do not engage adult predators, even if they look passive — the aggro radius is larger than the visible model
-
Group up with at least one other cub (family or random player) to share aggro
The cub stage is also where the family system matters most. Two cubs that stick together take roughly half as much damage from any single attack, because predator aggro splits between the closest targets — effectively giving each cub a 50% damage-reduction passive that no level-up can match. Tripling up drops per-cub damage to about 33%, so even a random pack of three cubs near a waterhole will outlast a solo player attacking the same hyena. Avoid stacking more than four, though, since territory boss aggro (lions, rogue hunters) scales with group size and will one-shot the whole huddle past that threshold.
Growth Stages, Badges, and the Long-Term Progression Roadmap
The growth system in Savannah Life is layered on top of the survival loop, and it's the mechanic that turns a 20-minute sandbox session into a 40-hour badge grind. Every animal ages through four stages: Cub → Juvenile → Sub-Adult → Adult, and each stage unlocks new abilities, stat breakpoints, and access to family roles. The savannah life wiki calls this the "age curve," and it gates everything from pride leadership to gamepass-locked skins.
Growth Stage Stat Breakpoints
| Stage | HP Multiplier | Damage Multiplier | Stamina Pool | Unlocks |
|---|---|---|---|---|
| Cub | 0.3x | 0.4x | 60% | Movement, basic eat/drink |
| Juvenile | 0.55x | 0.6x | 75% | Sprint, basic bite combo |
| Sub-Adult | 0.8x | 0.85x | 90% | Stealth (predators), call (prey) |
| Adult | 1.0x | 1.0x | 100% | Full ability kit, family leadership |
Aging up requires XP, which you earn passively through survival and actively through combat and exploration. XP rates scale with the difficulty of the action: a successful kill of a same-tier predator gives roughly 5x the XP of eating a plant, and surviving a full Blood Moon gives a chunky one-time bonus that the community has documented in badge-tracker spreadsheets.
Badge Roadmap: The 13 Official Badges
The current patch tracks 13 badges spanning the full savannah life difficulty curve, from beginner-friendly survival timers like Day Survivor (20 min) and Night Survivor (15 min) to map-sweep grinds like Master Explorer's 4–6 hour biome tour and the event-locked Tester badge that only fires during beta windows. Because the savannah life wiki badges are gated by independent triggers rather than a linear questline, the savannah life tips community has mapped each one against a recommended route — the table below lists requirements, difficulty, and estimated time so you can stack quick wins (Storm Survivor, Big Five) before committing to the multi-session badges.
| Badge | Requirement | Difficulty | Estimated Time |
|---|---|---|---|
| Day Survivor | Survive 1 in-game day cycle | Easy | 20 min |
| Night Survivor | Survive 1 in-game night cycle | Easy | 15 min |
| Storm Survivor | Survive a thunderstorm event | Medium | 30 min |
| Thunder Struck | Take lightning damage and survive | Hard (RNG) | 1–2 hours |
| Big Five | Play as lion, leopard, rhino, elephant, buffalo | Medium | 2–4 hours |
| Full House | Raise a pride to 8+ members | Hard | 3–5 hours |
| Predator Escape | Flee 10 predator encounters as prey | Medium | 1–2 hours |
| Master Explorer | Visit every named biome | Hard | 4–6 hours |
| Blood Moon | Survive 3 Blood Moons | Medium | 1.5–2 hours |
| Top of the Food Chain | 25 predator kills as an apex | Hard | 3–5 hours |
| Family Pride | Form a pride, raise cubs to adult | Hard | 4–6 hours |
| Tester | Play during a beta patch | Event-locked | Varies |
| Leaderboard | Reach top 100 weekly | Extreme | Varies |
The badge roadmap is the closest thing the savannah life walkthrough community has to a structured end-game, and the order in which you tackle them matters. Day and Night Survivor should be done inside the first session to clear the easy XP, then Storm Survivor and Big Five while you're still learning the map, and only then should you push the long-horizon badges like Master Explorer and Full House.
Coin Economy and Gamepasses
Coins are the soft currency, earned through combat, survival bonuses, codes, and group membership. Robux is the premium currency, used for gamepass skins, the 1.5x Coins booster, and the Grow 20 Faster pass. The savannah life wiki community generally recommends buying the 1.5x Coins gamepass first, because it pays for itself inside roughly 8 hours of play and stacks with the NOYO group membership's 10% coin bonus.
| Spend Type | Example | Cost | Who Should Buy |
|---|---|---|---|
| Utility gamepass | 1.5x Coins | Robux (one-time) | Anyone playing 5+ hours/week |
| Utility gamepass | Grow 20 Faster | Robux (one-time) | Players grinding growth stages |
| Cosmetic skin | Per-animal recolor | Robux | Collectors, completionists |
| Coin shop | Mid-tier animal unlock | 5,000–20,000 coins | Free-to-play players after 2–3 days |
The savannah life tips most often repeated by veteran players: don't blow your early coins on a fancy apex predator. Spend your first 20,000 coins on a mid-roster pick (cheetah or wild dog) that lets you learn combat without losing 30 minutes of progress to a single mistake. Our savannah life walkthrough for beginners covers the exact first-week spend plan that new players have refined.
Strategy, Combat, and Common Mistakes to Avoid
Combat in Savannah Life is built on three pillars: stamina management, positioning, and timing. A player who knows all three can take a mid-roster leopard into a duel against a heavyweight lion and come out ahead roughly 30% of the time, according to community combat logs. The savannah life walkthrough content on the wiki and on Deltia's Gaming all converges on the same set of strategic principles, which is a good sign that the meta has settled.
Predator vs. Prey Combat Patterns
| Animal Role | Core Strategy | Best Terrain | Worst Mistake |
|---|---|---|---|
| Apex Predator (lion, croc) | Patrol territory, group up, punish overextension | Watering hole, river bend | Solo roaming the open plains |
| Mid Predator (leopard, cheetah) | Ambush from tall grass, burst, retreat | Tall grass corridors, rocks | Sustained chase in open plains |
| Prey (impala, gazelle) | Herd up, run in groups, use stamina efficiently | Open plains with line of sight | Isolated drinking at a water hole |
| Heavyweight (hippo, elephant) | Hold position near water, force enemies to engage on your terms | River, deep mud | Leaving the water to chase prey |
The single most common mistake in the savannah life wiki "Common Mistakes" page is overchasing. A cheetah that burns its stamina sprinting after a gazelle is a cheetah that has signed its own death warrant, because the moment stamina hits zero, every predator in audio range can collapse on it for a free kill. The "burst → disengage → reset stamina → burst again" cycle is what separates an experienced cheetah player from a beginner.
Family and Pride Strategy
Family play is the system's biggest lever for long-term survival. A pride of three adult lions generates roughly 3x the damage output of a solo lion (thanks to the +25% pride stacking bonus per active member) and splits incoming damage across multiple HP pools. The mechanics are detailed in the savannah life wiki page on pride formation, and the family strategy section of any savannah life walkthrough will tell you the same thing: solo apex is fun for a few sessions, but pride play is where the badge grind becomes efficient.
Five Mistakes to Stop Making on Day One
-
Sprinting on cooldown — drains stamina, accelerates thirst, leaves you exposed
-
Ignoring thirst — kills faster than predators and gives no recovery window
-
Solo roaming as an apex — pride math gives you a 3x damage advantage, leaving it on the table is a waste
-
Spending early coins on cosmetics — buy the 1.5x Coins pass or a mid-roster combat animal first
-
Fighting during Blood Moon without a plan — predator damage is +50%, retreat to a den and wait it out
The savannah life tips community has been refining this list for over a year, and almost every "I'm stuck" post in the Discord traces back to one of these five errors. The game's systems are deep, but they're also legible — once you internalize the loop, the savannah stops feeling random and starts feeling like a system you can plan around.
Frequently Asked Questions
Is there an official Savannah Life wiki?
Yes — the community-maintained savannah life wiki on Fandom covers animal stats, growth mechanics, and gamepass recommendations, though data can lag behind patches. The most reliable source for current information is the official NOYO Productions page, which is updated with each patch.
What is the best starter animal in Savannah Life?
The impala is the best free starter because it teaches the survival loop (eat, drink, dodge) without punishing mistakes too harshly. Once you have 5,000–10,000 coins, the wild dog is the best mid-roster unlock — it has enough damage to solo juvenile prey and enough stamina to escape apex predators.
How do I age up fastest as a cub?
Stay near a burrow, group with at least one other cub, and chain easy XP sources: plants, small prey, and survival bonuses. The Grow 20 Faster gamepass cuts growth time by roughly 20% and pays for itself inside the first two adult stages.
Where do I drink water in Savannah Life?
Anywhere along the central river, at the three named watering holes, or at the small puddles scattered through the woodlands biome. Walk into the water, stop moving, and press Q. If Q doesn't trigger, you may be standing on the bank rather than in the water itself.
Can I play Savannah Life with friends?
Yes — form a pride or herd through the F (interact) key, or join an existing group via the player menu. Group play multiplies XP gain, splits aggro, and unlocks the family-only badges (Full House, Family Pride) that solo players can't earn.