
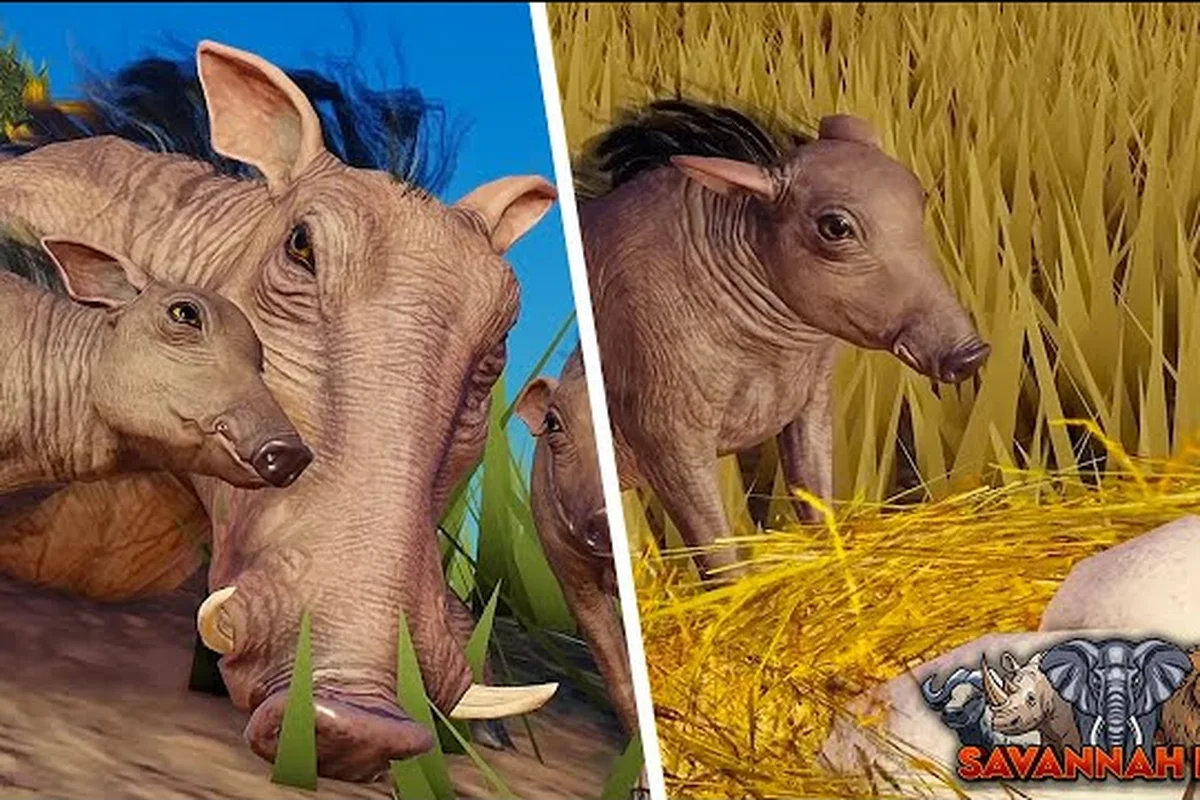
Knowing the right burrow in Savannah Life can be the difference between raising a healthy litter and respawning inside a pride's territory. The map is littered with hiding holes, den entrances, and rocky crevices, but not every shelter actually breaks a predator's line of sight, and not every patch of tall grass counts as cover when a lion pride is mid-stalk. Players who learn where the real burrows sit, which burrows reset aggression, and where lions actually roam usually double their average cub survival rate within a few in-game weeks.
This guide walks through the strongest burrow locations in the game, breaks the map into safe versus dangerous zones, and shows where the prides spawn so you can plan a territory around them rather than stumble into one. Every recommendation here is built on community testing reported across the Savannah Life Fandom wiki and the official developer pages, with a focus on the current 2026 build.
Reading the Savannah Map: Safe Zones vs. Dangerous Areas
The Savannah Life map is divided into roughly ten named biomes, and each biome behaves very differently once a predator locks on. According to the official Savannah Life's official Roblox listing listing, diving into cover ends most chases and gives wounded animals time to recover, which means the value of a burrow depends on whether the biome around it actually supports the behavior. Some biomes, like the open Termite Mounds, barely count as cover, while the Swamp's thickets reset nearly every pursuit.
Biome Threat Tier
| Biome | Predator Pressure | Burrow Quality | Recommended for Cubs |
|---|---|---|---|
| Swamp | Low | High (dense thickets, 5+ usable burrows) | Excellent |
| Termite Mounds | High | Low (open, exposed) | Avoid |
| Savanna Plains | Medium | Medium (scattered hyena dens) | Acceptable |
| Sablerock Outcrops | Medium-High | High (rocky crevices) | Good |
| Mirage Oasis | Low | High (secret hole, palm cover) | Excellent |
| Tall Grass Fields | Medium | Medium (grass breaks LOS) | Acceptable |
| Riverbed Crossing | Very High | Low (crocodile zone) | Avoid |
The Swamp and Mirage Oasis consistently rank as the safest zones because their burrow density outnumbers nearby predator spawns, while the Riverbed and Termite Mounds stay on every veteran's list of dangerous areas to skirt. If you're new to the map, the general Savannah Life map guide covers every named region in more detail, including the watering holes and the crocodile-heavy stretches.
Predator Sightlines
Lions, leopards, and hyenas all rely on line-of-sight detection before they commit to a chase. Tall grass and tree clusters break that line, but the break is only counted by the server if your avatar is actually inside a marked cover volume. Standing one tile outside a thicket still counts as fully visible, which is the most common reason new players report that "the burrow didn't work." A genuine burrow location is one where the entire avatar model is concealed by the geometry, and where the biome grants a brief aggression cooldown when you enter.
Best Burrow Locations and Hiding Spots
A burrow is only as good as what it lets you do next. The strongest locations on the map are the ones that combine immediate safety with access to a water source, a food patch, and a fast escape route if a second predator wanders in. The community on the Tips and Tricks of Savannah Life Facebook group regularly highlights the same shortlist, which lines up closely with what the NOYO Productions studio page describes as defensive-first species design.
Top Tier Burrow Picks
| Burrow | Biome | Predator Reset | Water Nearby | Cub Rating |
|---|---|---|---|---|
| Mirage Secret Hole | Mirage Oasis | Yes | Yes (palm pool) | S-tier |
| Swamp Hollow #3 | Swamp | Yes | Partial | S-tier |
| Sablerock Crevice (East) | Sablerock | Yes | No | A-tier |
| Tall Grass Burrow #2 | Tall Grass Fields | Yes | No | A-tier |
| Hyena Den Outskirts | Savanna Plains | Partial | No | B-tier |
| Open Warthog Burrow | Termite Mounds | No | No | D-tier |
The Mirage Secret Hole is the single best early-game burrow because it sits between a fresh water pool and three palm clusters, and lions almost never patrol the interior. Swamp Hollow #3 comes in a close second for nursing mothers because the thicket resets aggression for roughly 30 seconds, which is enough time to feed cubs or recover stamina.
Species-Specific Hiding Strategies
Different animals lean on burrows in different ways, and forcing a lion into a warthog burrow is a fast way to learn why. Warthogs and porcupines are built to hold a defensive position, while cheetahs, gazelles, and young lions rely on burrows only as a last resort because they need open ground to use their speed.
| Species | Best Burrow Type | Notes |
|---|---|---|
| Warthog | Deep burrow, single entrance | Quills block chases; never leave while a predator is mid-attack |
| Porcupine | Rock crevice, narrow mouth | Quills make most predators disengage after one hit |
| Hyena | Shallow den, two exits | Strong in groups; weak solo against lion pairs |
| Cheetah | Open grass, no burrow | Speed is the defense; burrows trap you |
| Gazelle | Tall grass edges | Use thin cover, never commit to a closed burrow |
| Lion Cub | Swamp or Mirage burrow | Always under adult escort; never solo |
If you're weighing which defensive animal to main, the cheetah tier list breakdown explains why cheetahs and burrows do not mix, and which predators actually reward burrow play.
Where Lions Spawn and How to Avoid Pride Territory
Every pride in Savannah Life has a fixed spawn anchor, and the spawn anchors are why some burrows are useful and others are death traps. The southwestern pride controls the Termite Mounds and the open plains east of the river, the central pride patrols the Sablerock and the Tall Grass Fields, and a smaller satellite pride drifts around the Mirage Oasis at dawn and dusk. Learning the spawn circle for each pride is the single biggest upgrade you can make to your daily route, because it lets you walk directly between burrows without ever crossing a patrol line.
Lion Pride Spawn Anchors
| Pride | Primary Spawn | Patrol Range | Peak Hours |
|---|---|---|---|
| Southern Pride | Termite Mounds SW | Plains, Termite Mounds | Day (06:00–18:00) |
| Central Pride | Sablerock North | Sablerock, Tall Grass Fields | Dusk (17:00–20:00) |
| Satellite Pride | Mirage Oasis Edge | Mirage, Savanna border | Dawn (05:00–08:00) |
| Nomad Male | Random | Any open biome | All day, rare |
The Southern Pride is the most predictable group because it rarely leaves the Termite Mounds during daylight, which means burrows in the Swamp and Mirage are reliably safe between 06:00 and 18:00. The Central Pride is more aggressive at dusk, which is when most cub losses happen in the Tall Grass Fields. If you're routing between burrows, the crocodile spawn guide pairs well with this knowledge, because the same river crossings the crocodiles guard also border the Southern Pride's hunting corridor.
Reading Patrol Cues
Lions telegraph their patrols through three reliable cues: birds flushing from tall grass, hyenas barking in a fixed direction, and the in-game "alert" marker that appears when a predator is within 60 meters. Veteran players recommend building any burrow-to-burrow route around those three signals rather than around the map's visual landmarks, because the landmarks shift slightly between server versions while the cue behavior has stayed stable across the 2026 patches.
Best Hunting Routes Near Burrows
A burrow only protects you if you can actually feed. The best burrow setups are the ones paired with a known prey route, so you can pop out, score a quick meal, and dive back into cover before the predators reorient. The community has settled on three classic loops that combine cover, water, and a steady food supply, all of which are easy to learn as a new player.
Prey Density by Biome
| Biome | Common Prey | Density | Safe to Hunt During Day? |
|---|---|---|---|
| Tall Grass Fields | Gazelle, hare | High | Yes, with burrow nearby |
| Swamp | Frog, small bird | Medium | Yes |
| Mirage Oasis | Rabbit, small lizard | Medium | Yes, dawn only |
| Savanna Plains | Gazelle, warthog | High | Risky, lion pressure |
| Termite Mounds | Warthog, hare | High | Avoid, lion pride |
| Riverbed | Fish, frog | Low | No, crocodile zone |
The Tall Grass Fields are the best hunting biome for burrow-supported play because the prey density is high, the grass breaks line of sight on the way out, and the Sablerock Crevice burrow sits within a short sprint. The Termite Mounds look attractive on paper, but the Southern Pride's patrol makes any daytime hunt there a coin flip unless you have a full warthog burrow already cleared and an escape path mapped.
Three Reliable Burrow Loops
| Loop | Burrow Anchor | Prey Zone | Risk Level |
|---|---|---|---|
| Mirage Loop | Mirage Secret Hole | Mirage Oasis | Low |
| Swamp Loop | Swamp Hollow #3 | Swamp interior | Low |
| Sablerock Loop | Sablerock Crevice East | Tall Grass Fields | Medium |
The Mirage Loop is the strongest for solo players because the satellite pride only drifts in at dawn, and the palm cover around the secret hole gives a second reset if the first dive fails. The Swamp Loop is ideal for groups raising cubs, and the Sablerock Loop is the highest-reward option for experienced predators who want to combine hunting with territory control.
Surviving Cub Stages in Burrow Territory
Cub survival is the metric that separates experienced packs from casual players, and burrows are the centerpiece of every successful cub strategy. Cubs cannot dive into most adult burrows without an escort, and the server only counts the burrow as cover if the cub's parent enters the volume first. That rule is the reason most cub losses happen in the open, even when a burrow sits one tile away. Setting up a cub burrow means thinking about three things at once: the burrow's own geometry, the parent line of sight, and the predator spawn window for that biome.
Cub Burrow Checklist
| Requirement | Why It Matters |
|---|---|
| Parent can stand inside the volume | Server only counts cover when parent enters first |
| Water within 60 meters | Cubs dehydrate twice as fast as adults |
| Two escape paths | Single-entrance burrows trap the whole family |
| Predator spawn outside patrol range | Avoid southern pride for the first 10 in-game days |
| Grass or rock cover within sprint distance | Emergency dive if the burrow is contested |
The safest cub strategy is to claim a Mirage or Swamp burrow during the first three in-game days, keep the entire pack within 40 meters of the burrow entrance, and never let cubs out of the parent's line of sight. If you need to move the pack, run the swap at dawn when the satellite pride has rotated out and before the Southern Pride's morning patrol begins. For players who want to push cub survival into the 90% range, the survivor badges guide covers the long-game skills that pair with a solid burrow setup, including the 100-hour survivor badge and night survival basics.
Common Burrow Mistakes
| Mistake | Why It Fails | Fix |
|---|---|---|
| Standing one tile outside the thicket | Server doesn't count cover | Walk fully into the volume |
| Using the same burrow every day | Predators learn the pattern | Rotate between two burrows |
| Bringing cubs to a warthog burrow | Cubs cannot anchor in adult-only burrows | Use Mirage or Swamp for cubs |
| Hunting from a burrow during dusk | Central pride patrols Tall Grass at dusk | Stay inside until 20:00 |
| Ignoring water distance | Cubs dehydrate fast | Camp within 60 meters of water |
Most of these mistakes come from one underlying cause: players treat burrows as map labels instead of as mechanics. The mechanic is what resets aggression, what counts as cover, and what governs the cub-following rule. Once you understand those three rules, the map's safe zones become obvious, and the dangerous areas become places to cross quickly rather than places to live.
Where to Hunt, Where to Hide: Quick Reference
| Situation | Best Biome | Best Burrow | Predator to Watch |
|---|---|---|---|
| Solo cub raising | Mirage Oasis | Mirage Secret Hole | Satellite pride at dawn |
| Group cub raising | Swamp | Swamp Hollow #3 | Nomad hyena packs |
| Solo hunting | Tall Grass Fields | Sablerock Crevice East | Central pride at dusk |
| Group hunting | Savanna Plains | Hyena Den Outskirts | Southern pride by day |
| Night survival | Swamp | Swamp Hollow #3 | Nocturnal leopards |
| Water run | Mirage Oasis | Mirage Secret Hole | Crocodile at riverbed |
The table above is a good quick reference, but the underlying rule is consistent across every situation: pair a high-burrow-density biome with a prey route that the local predator pride does not patrol during your active hours. If you can do that, the best hiding spots in Savannah Life stop being a secret and start being a daily routine.
Frequently Asked Questions
Where are the best burrow locations in Savannah Life for new players?
The Mirage Secret Hole and Swamp Hollow #3 are the two strongest starter burrows because both sit in low-predator biomes, reset aggression on entry, and have water within a short sprint. New players should claim one of these before exploring the open plains.
Where do lions spawn most often in Savannah Life?
The Southern Pride spawns at the Termite Mounds and patrols the open plains during the day, while the Central Pride rotates through Sablerock and Tall Grass Fields around dusk. A smaller satellite pride drifts around Mirage Oasis at dawn.
What is the safest biome to raise cubs in?
The Swamp is the safest biome for cub play because it has five usable burrows, low predator pressure, and dense thickets that break line of sight. The Mirage Oasis is a close second, but its dawn satellite pride requires more attention.
Where can I find prey near a burrow?
The Tall Grass Fields have the highest prey density in the game and pair well with the Sablerock Crevice burrow. The Swamp also supports steady hunting for frogs and small birds, which is enough food for a small pack raising cubs.
How do I avoid the most dangerous areas on the map?
The Riverbed Crossing and the open Termite Mounds are the two dangerous areas to avoid, because crocodiles guard the river and the Southern Pride patrols the mounds. Cross both zones quickly, prefer the Swamp detour, and never camp in either biome without a full warthog burrow already secured.