
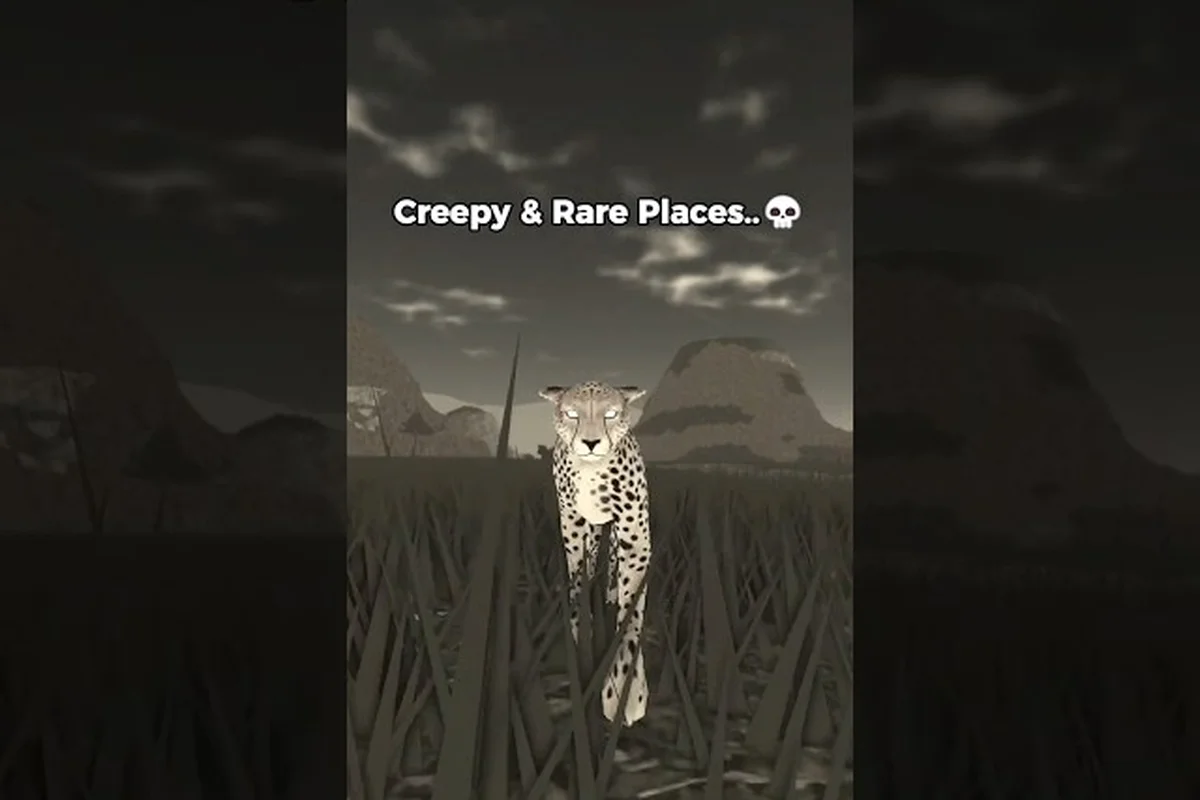
The Savannah Life Kruger National Park map is one of the most faithfully rendered open-world savannah simulators on Roblox, and the terrain almost perfectly mirrors South Africa's largest game reserve. Players who treat the map like a tourism brochure miss the real survival depth, because the developers carefully reproduced the Sabie River corridor, the Mopani thickets, and the open Lebombo grasslands that define the real park. Understanding how those zones connect — and where the predators hide — is the difference between a quick safari run and a ten-minute corpse run back to your last save.
This terrain guide walks every region, breaks down the best camping spots, highlights the safest ambush zones, and maps the fastest travel routes so you can plan a full Kruger-style circuit without backtracking through lion territory. The advice is built from community testing on the public Savannah Life build and cross-referenced with real-world geography from the Kruger National Park Wikipedia entry, since the developer roster at NOYO Productions draws directly from that ecosystem.
Reading the Savannah Life Kruger National Park Layout
The map is divided into seven distinct biomes, each tied to a real Kruger landmark, and they connect through narrow chokepoints that act as natural ambush corridors. Before picking a campsite or plotting a route, you need to understand how those biomes blend into one another and where the elevation changes — because line-of-sight is everything when a leopard is hunting you.
The Seven Core Regions
The community wiki at Savannah Life Wiki - Fandom lists the regions by their in-game names, which are almost identical to their real Kruger counterparts. Players consistently report that the south-to-north progression mirrors the actual park layout, making this one of the most accurate open-world Roblox maps modeled on a single real-world location.
| Region | Real Kruger Counterpart | Dominant Terrain | Predator Density | Water Access |
|---|---|---|---|---|
| Southern Sabie | Sabie River basin | Riverine forest, soft mud | Medium (leopard) | High (river) |
| Skukuza Flats | Skukuza rest camp area | Mixed woodland, dirt roads | Low (hyena packs) | Medium (dams) |
| Mopani Central | Mopani camp region | Dense mopane thicket | High (lion prides) | Low (seasonal pans) |
| Olifants Plateau | Olifants River gorge | Rocky highland, basalt ridges | Medium (climbing leopards) | Medium (river gorge) |
| Letaba Crossing | Letaba River confluence | Open floodplain, tall grass | Very High (elephant herds) | High (river) |
| Pafuri Triangle | Pafuri gate, Crooks' Corner | Fever tree forest, marshy edge | Low but deadly (crocodile) | Very High (Limpopo) |
| Lebombo Grasslands | Eastern Lebombo mountain range | Open savannah, scattered kopjes | Medium (cheetah) | Low (rain-shadow) |
The southern third of the map is more forgiving because the river acts as a natural speed bump, but once you cross the Olifants Plateau and push into Pafuri, every body of water doubles as a crocodile hazard. Community reports suggest the northern zones feel emptier because herbivore AI spawns thinner there, which in turn attracts the apex predators. That said, the Lebombo Grasslands are deliberately open to give cheetah their chase room, so expect to be spotted long before you reach cover.
Elevation and Line-of-Sight
The map uses three elevation bands: river-level floodplains, mid-level woodland, and the high Lebombo ridge that runs along the eastern edge. Climbing to the ridge gives you a full panoramic view of the next two biomes, which is invaluable when you are planning a long crossing into predator territory. The drawback is that you are fully silhouetted against the sky, and any cheetah or leopard on the plateau will see you before you see them.
Skukuza Flats sits in the middle of the elevation map and acts as the de-facto hub. Most players respawn within a short walk of Skukuza when they die, which makes it the logical place to bank progress, regroup with a pack, and stage your next expedition north. Treat the camp as you would treat Skukuza rest camp in the real park: it is safe, but it is also where you will run into every other player on the server.
Savannah Life Terrain Guide: Hazards by Biome
Every biome has a different threat profile, and the terrain itself is the warning system. Mud patches slow prey and hunters equally, tall grass breaks line-of-sight, and rocky outcrops give climbing predators an attack vector from above. The following section maps those hazards so you can read the ground before you step on it.
Ground Cover and Stealth
The Mopani Central thicket is the worst stealth nightmare for new players because the mopane trees create a closed canopy that blocks aerial vision but still allows short-range predator AI to track movement. Tall grass in the Letaba Crossing floodplain works the opposite way: you can see for hundreds of studs, but so can a cheetah cresting the rise. The community-tested rule is to crouch-walk in mopane and sprint through Letaba, because the predators there rely on sprint speed rather than stealth.
Mud is another underrated hazard. The Southern Sabie basin floods after the in-game rain cycle, and the soft riverbank slows your sprint by roughly 40 percent, according to player benchmarks. Predators learn this quickly, and lion prides routinely patrol the muddy edges after rain, because wounded or fleeing prey get bogged down and become easy kills. If you are wounded, never cut through the Sabie mud — loop around through Skukuza instead.
Predator Sighting Patterns
Predators in Savannah Life follow a territory-based patrol AI rather than a global respawn timer, which means once you learn the patrol path you can plan around it. The following table summarises the patterns that community testing has consistently reported, although exact spawn timing varies by server population.
| Predator | Primary Biome | Peak Activity | Telltale Sign |
|---|---|---|---|
| Leopard | Southern Sabie, Mopani edges | Dawn and dusk | Barking alarm calls from impala |
| Lion Pride | Mopani Central | Midday, post-rain | Dust clouds on the dirt road |
| Hyena Pack | Skukuza Flats, Olifants fringe | Night | Laughing cackle audio cue |
| Cheetah | Lebombo Grasslands | Late morning | Distant gazelle scattering |
| Crocodile | Pafuri Triangle, Letaba riverbank | Midday, hot hours | V-shaped wake on the water |
| Elephant Bull | Letaba Crossing | All day, but rut in dry season | Low rumble, ground tremor |
| Wild Dog | Skukuza to Olifants corridor | Early morning | High-pitched contact calls |
Reading the audio cues is half the terrain skill. When impala start stotting and barking in Southern Sabie, a leopard is almost certainly on the move. When you hear a hyena laugh near Skukuza, the pack is rotating between den sites, and the safest move is to back off into the rest-camp perimeter. These patterns are community-reported rather than developer-documented, so treat them as reliable trends rather than guaranteed timers, especially after major patches.
Savannah Life Regions List and Fastest Travel Routes
Long-distance travel is the most common reason new players die, because the temptation to take a straight-line route always runs straight through predator territory. The map's road system is deliberately indirect, and the developers wired the dirt tracks to follow the real Kruger road network, which means the fastest safe path is almost never the shortest geometric line. The route-planning table below assumes you are moving on foot with no special traversal gamepass; vehicles change the math significantly.
Route Options Between Hubs
| From → To | Direct Distance | Fastest Safe Route | Estimated Time | Risk Level |
|---|---|---|---|---|
| Skukuza → Sabie | Short | Skukuza gate east, then river path | 3-4 min | Low (hyena only) |
| Skukuza → Mopani | Medium | Skukuza north road, veer west at the marula tree | 6-8 min | Medium (lion patrol) |
| Skukuza → Olifants | Long | Skukuza → Mopani edge → Olifants ridge | 11-13 min | Medium-High |
| Olifants → Letaba | Medium | Cross at the causeway, not the river | 7-9 min | High (elephant rut) |
| Letaba → Pafuri | Medium | Follow the Limpopo tree line, stay on hard ground | 9-11 min | High (crocodile) |
| Pafuri → Lebombo | Long | Pafuri gate east, climb via the kopje switchback | 14-16 min | Medium (cheetah) |
| Skukuza → Lebombo | Very long | Skukuza → Olifants → Letaba → Pafuri → Lebombo | 35-40 min | High overall |
The fastest way to cover ground on this map is to chain dirt-road sprints between rest camps, because the road surface gives a flat 1.2x movement bonus and predators are less likely to ambush in the open. Off-road travel through tall grass or mopane is slower and noisier, even though the geometric distance is shorter. Players who need to move quickly should hug the road until they are within a minute of their destination, then cut into cover for the final approach.
If you are doing a full Kruger-style circuit, the optimal loop is Skukuza → Southern Sabie → Skukuza → Mopani → Olifants → Letaba → Pafuri → Lebombo → Skukuza, which takes roughly 75 to 90 minutes on foot and lets you bank at Skukuza between sections. New players often try to skip the Skukuza banking step to save time, but every death sends you back to the previous respawn anyway, so the loop effectively runs itself once you commit to it.
Crossing Points and Chokepoints
There are only four safe river crossings on the entire map, and each one is a natural ambush zone. The Sabie low-water bridge south of Skukuza is the safest, because it is patrolled by hyena rather than crocodiles, but it bottlenecks into a single-file path that predator AI loves. The Olifants causeway is a raised concrete structure that predators cannot climb onto, so it is the safest multi-biome crossing despite the longer detour. The Letaba causeway is similar but routinely blocked by elephant herds during the dry-season rut, which forces a long wait or a dangerous swim. The Pafuri drift is the riskiest, because the Limpopo runs deep and the crocodiles there are aggressive even at low water.
The community consensus is to cross at midday when the big cats are resting, and to never linger on a bridge once you are on it. If you are crossing with a pack, spread out by at least 15 studs so a single predator ability cannot wipe the group. The Savannah Life gameplay guide has a useful breakdown of the stamina math behind sprinting across the long Olifants causeway, since running out of stamina mid-crossing is a common death cause for solo players.
Savannah Life Best Camping Spots and Safe Zones
Camping is more than a cosmetic roleplay option — it is the only way to bank XP, restock hunger bars, and reset the predator aggression timer in your immediate area. Picking the right campsite, however, is a terrain-reading exercise. The best spots balance three factors: defensibility against predators, proximity to water without being on the riverbank, and clear sightlines so you can see threats before they reach the tent.
Tier List of Campsites
The community has stress-tested the major campsites for survivability, and the following ranking reflects both solo and pack playtesting. A campsite's tier can shift slightly after major patches, so check the Savannah Life beginner guide after each update for the latest meta.
| Tier | Campsite | Biome | Defenses | Best For |
|---|---|---|---|---|
| S | Skukuza Rest Camp | Skukuza Flats | Walled perimeter, NPC patrols | Banking, regrouping, starter base |
| A | Lower Sabie Picnic | Southern Sabie | Rock overhang, river access | Solo hunting trips, hydration |
| A | Olifants Lookout | Olifants Plateau | Elevated ridge, one approach | Pack staging, anti-ambush |
| B | Letaba East Bank | Letaba Crossing | Open sightlines, but exposed | Daytime herbivore farming |
| B | Mopani Shade | Mopani Central | Thick cover, low visibility | Stealth recovery, low-profile rest |
| C | Pafuri Drift Edge | Pafuri Triangle | High water access, croc risk | Emergency water, last resort only |
| C | Lebombo Kopje | Lebombo Grasslands | Exposed, cheetah patrol | Sunrise sightseeing, not overnight |
The Skukuza Rest Camp is the only true safe zone on the entire map. NPC patrols actively chase predators out of the perimeter, which means you can AFK here without being eaten, and the camp has the only working storage chest in the game. Treat it as home base and plan every expedition to end back at Skukuza.
The Lower Sabie Picnic site is the best secondary base for solo players because the rock overhang prevents lion ambushes from above, and the river is a short sprint for hydration. The Olifants Lookout is the best pack-staging camp because the single approach means you can only be attacked from one direction, and the elevation gives you a clear view of incoming predators for at least 200 studs. Both A-tier sites have minor drawbacks — Lower Sabie floods after heavy rain, and Olifants Lookout is exposed to wind and cold nights — but those are manageable with the right gear.
Ambush Spots to Avoid
Every campsite has a known counter-spot where predators tend to spawn, and the worst offenders are the Mopani Shade and Pafuri Drift Edge locations. Mopani Shade sits inside a dense thicket, and the closed canopy lets leopards drop from the branches directly onto the tent. Pafuri Drift Edge is on the actual riverbank, and crocodiles can lunge from the water without warning.
| Campsite | Known Ambush Vector | Counter |
|---|---|---|
| Mopani Shade | Leopards dropping from canopy | Sleep in shifts, one player on watch |
| Pafuri Drift Edge | Crocodile lunges from water | Camp 30 studs back from bank |
| Letaba East Bank | Elephant charge at dawn | Move camp inland before sunrise |
| Lebombo Kopje | Cheetah sprint at dawn | Avoid overnighting, use as day stop only |
| Skukuza perimeter | Hyena raids at night | Stay inside walls, bank before dark |
A common rookie mistake is to camp right next to a water source because of the convenience, but the riverbank is where every predator in the game is already waiting. A 30-stud buffer between tent and water cuts ambush rates dramatically, according to community data, and it gives you time to react if something charges. The other major mistake is to overnight at Lebombo Kopje, because cheetah AI is coded to patrol the kopjes at dawn looking for sleepers, and you will not hear them coming over the wind.
Savannah Life How to Travel Fast and Ambush Spots for Hunters
If you are playing a predator role, the terrain that is dangerous to prey is your hunting ground. The map's design gives ambush predators a few standout kill zones where the geometry funnels prey into a single chokepoint or hides your approach until the last second. Knowing those zones lets you farm XP efficiently, and it doubles as prey-knowledge, because if you know where the ambushes are, you know where not to walk.
Top Ambush Zones by Predator Role
| Predator Role | Best Ambush Zone | Why It Works | Recommended Pack Size |
|---|---|---|---|
| Leopard | Southern Sabie riverbank bend | Mopane trees block aerial view | Solo |
| Lion Pride | Mopani Central game trail | Tall grass, single-file prey path | 3-4 |
| Hyena Pack | Skukuza perimeter at night | Exhausted prey returning to camp | 4-6 |
| Cheetah | Lebombo long grass | Open chase, 200-stud sprint | Solo or duo |
| Crocodile | Pafuri deep channel | Underwater, invisible to prey | Solo |
| Wild Dog | Olifants to Skukuza corridor | Cooperative relays, daybreak | 5+ |
The most efficient solo XP farm for an ambush predator is the Southern Sabie riverbank bend, where the river curves sharply and the mopane canopy blocks aerial recon. Prey following the river have to slow down to round the bend, which gives a leopard the half-second it needs to pounce. The trick is to approach from upwind and stay in the tree line until the prey is committed to the curve.
For pack play, the Mopani Central game trail is the highest-density ambush zone on the map. Prey animals use the trail because the thicket makes off-trail movement exhausting, and that predictability lets a coordinated lion pride set up a cross-fire at the narrowest section. Pair this with one player driving prey down the trail and two flanking through the canopy, and the kill rate is high enough to sustain a pride for an entire afternoon.
Hyena players have a unique advantage at the Skukuza perimeter, because exhausted prey returning to the rest camp routinely drop their guard in the last 50 studs. The hyena laugh audio cue is also terrifying to new players, so you get free psychological pressure before the engagement even starts. For cheetah players, the Lebombo long grass is the only zone that gives you enough room for a full sprint, and the scattered kopjes break your silhouette just long enough to close distance.
If you are new to predator play, start with the leopard role at the Sabie bend because the solo-friendly geometry forgives positioning mistakes, then graduate to the lion pride at Mopani once you have a reliable pack. The progression curve mirrors real-world big-cat hunting tactics, and that is part of why the developers leaned so heavily on the Kruger inspiration. For stamina and hunger management during long hunts, the Savannah Life how to level up guide has the most efficient rotation for staying fed while you patrol your ambush zone.
Savannah Life Map Based on Kruger: Geography to Spot
One of the map's most rewarding details is the way the developers translated real Kruger geography into gameplay. If you have ever visited the actual park, several landmarks will feel familiar the moment you spawn in. This is also a quick way for new players to build a mental map of the world without staring at a static reference image, because the landmarks themselves are the navigation aids.
| In-Game Landmark | Real Kruger Inspiration | Navigational Use |
|---|---|---|
| Sabie low-water bridge | Sabie River causeway near Lower Sabie camp | Southern crossing, fast route |
| Mopani marula tree | Famous marula tree near Mopani camp | Mid-map waypoint |
| Olifants basalt ridge | Olifants River gorge basalt formations | High-ground vantage |
| Letaba causeway | Letaba River low-level bridge | Elephant-safe crossing |
| Pafuri fever tree forest | Pafuri gate fever tree forest | Northern landmark, croc warning |
| Lebombo kopje chain | Eastern Lebombo mountain outcrops | Long-distance navigation spine |
| Skukuza rest camp layout | Skukuza camp rondavel arrangement | Hub identification |
The fever tree forest at Pafuri is particularly striking because the in-game rendering captures the lime-green trunk colour that makes the real forest instantly recognisable. Players who have visited Kruger will also notice the basalt columns along the Olifants ridge, which the developers reproduced block-for-block from reference photos according to community interviews. Even the Skukuza camp layout follows the real rondavel arrangement, which is why the camp feels familiar to anyone who has stayed there in person.
The Savannah Life progression guide is worth pairing with this map knowledge, because hitting the adult growth stage unlocks the stamina needed to make the long Olifants to Pafuri crossing in one push. Younger animals simply do not have the breath for it, which is a nice design touch that mirrors how real herbivores stage their migrations through the park.
Putting the Whole Kruger-Style Circuit Together
The full Kruger National Park-style circuit takes about 90 minutes on foot, rewards roughly two full XP bars, and lets you visit every biome without backtracking if you plan it well. The recommended route is the loop described earlier: Skukuza → Southern Sabie → Skukuza → Mopani → Olifants → Letaba → Pafuri → Lebombo → Skukuza. The route is intentionally not linear, because the developers wired the dirt roads into a circuit, and following the road network is faster than cutting cross-country.
The two best times to start the circuit are dawn and late afternoon, because predator activity is highest at those times, which means higher XP from kills and faster progression, but also higher death risk. New players should start at late afternoon to get a feel for the dusk ambush patterns, then move their start time earlier as they learn the audio cues. The mid-day slot is the safest but also the slowest for XP, because most predators are resting and the herbivores are harder to find in the tall grass.
If you are farming coins alongside XP, the circuit hits the highest-density herbivore zones at the optimal times, which is a good complement to the dedicated Savannah Life coin farming guide. The two guides together are the closest thing the game has to a complete walkthrough of the survival economy, because the terrain routes and the coin hotspots overlap almost perfectly.
Frequently Asked Questions
Is the Savannah Life Kruger National Park map officially licensed?
The developers at NOYO Productions have not announced an official licensing deal with South African National Parks, but the in-game region names, animal roster, and terrain features all line up with Kruger geography closely enough that the community treats it as a tribute map. It is best described as fan-inspired rather than officially endorsed.
What is the safest route from Skukuza to Pafuri for new players?
The safest route follows the dirt roads via Olifants and Letaba, with two causeway crossings and a final stretch along the fever tree forest. It takes roughly 30 to 35 minutes on foot and avoids the high-risk Limpopo swim, which is the single most common cause of death for unprepared players.
Where are the best Savannah Life ambush spots for solo leopard players?
The Southern Sabie riverbank bend and the Mopani canopy edge are the two highest-yield solo leopard zones. Both have natural cover that breaks aerial sightlines, and the prey path funnels predictably enough that one well-timed pounce secures the kill.
Can you camp safely inside Mopani Central?
You can, but only with a pack and a dedicated watch rotation. The closed canopy lets leopards drop from above without warning, so solo players should treat Mopani as a day-hunt zone and bank at Skukuza or Lower Sabie overnight.
How long does a full Kruger-style circuit take in Savannah Life?
A complete Skukuza-to-Skukuza circuit through all seven biomes takes roughly 75 to 90 minutes on foot at adult growth stage. Younger animals should add 20 to 30 minutes for stamina rests, and pack play can shave 10 to 15 minutes off the time through coordinated predator clears.